Halloween fun: Simple spooky spiders
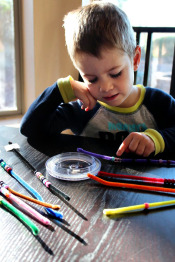
Doing projects together are one of the primary orders of business when I visit Bubby and Mac, as I did this past weekend. I like to have most of the items with me in my Grandma Bag, so I set out last week to accumulate ideas and came across this spider craft on Pinterest.

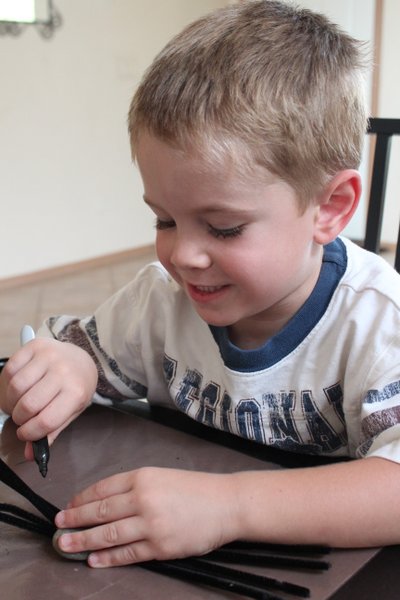
After tweaking just a tad, it turned out as easy and inexpensive as could be. Plus, our simple spooky spiders had just the right amount of creep factor to make it festive fun for four-year-old Bubby.

simple spooky spiders.JPG

WHAT YOU NEED:

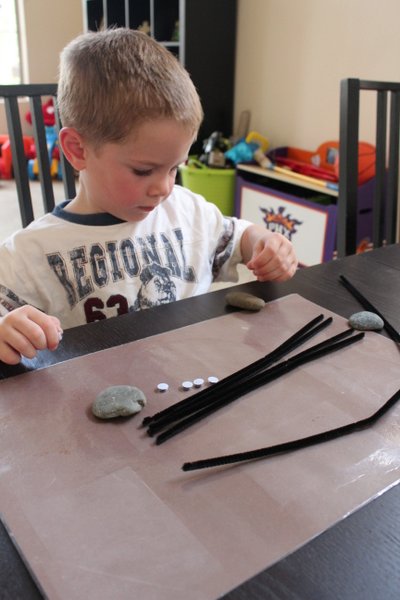
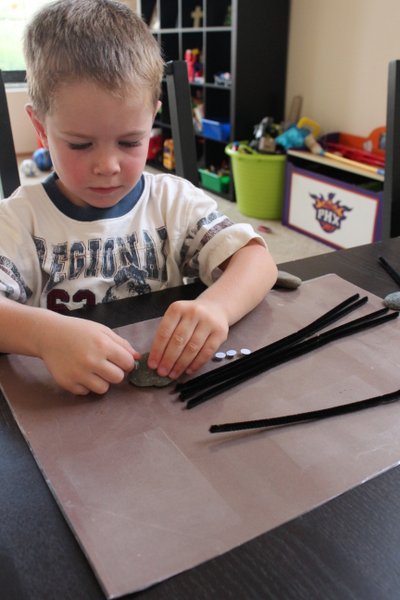
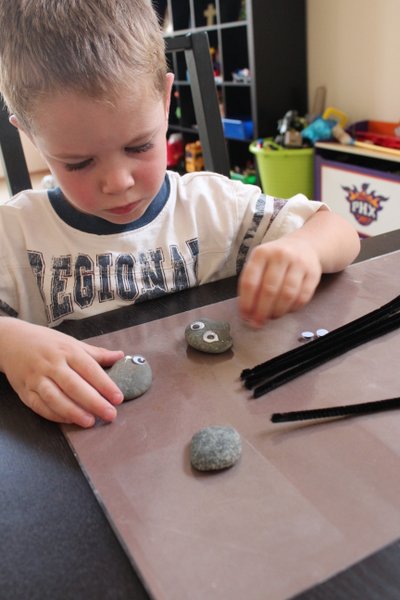
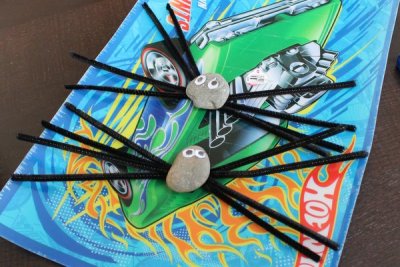
Rock bodies — one per spider, about silver-dollar size

Wiggly eyes

Long pipe cleaners/chenille stems — four per spider

Black marker/Sharpie for drawing mouths, if desired (Bubby desired)

Craft glue

Hot glue gun and glue, for use by adult only

WHAT YOU DO:

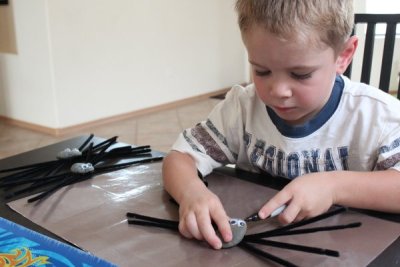
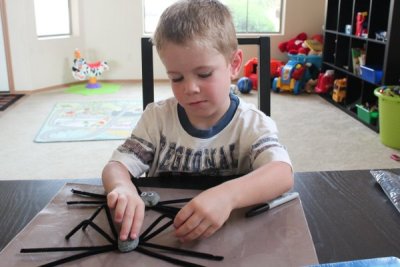
 1. Glue desired number of eyes on spider bodies, using craft glue.

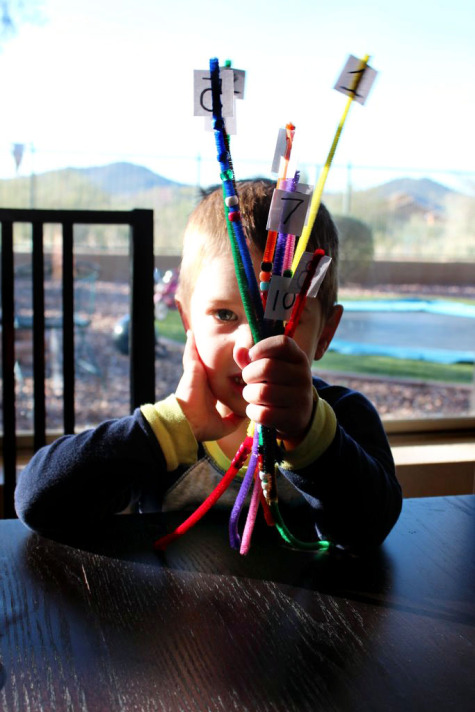
2. Line up four pipe cleaners per spider...

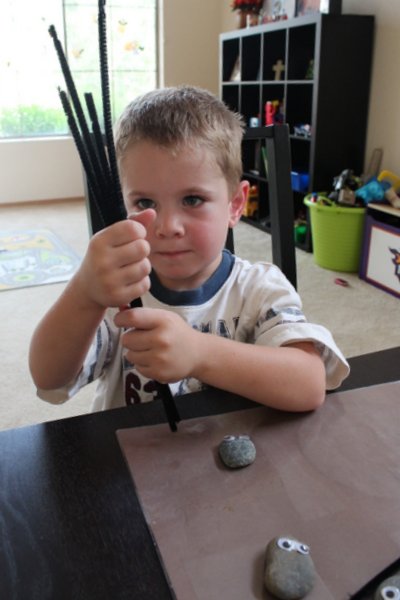
...then twist together a few times in the center to connect them.

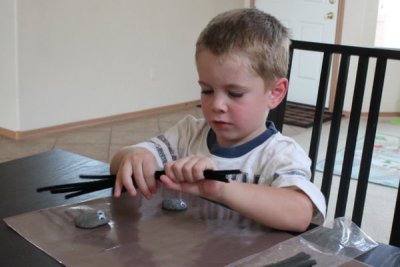
3. Give twisted legs and rock bodies to an adult (preferably a grandma) to attach legs with hot glue on bottom center of rock body, glopping the glue at the spot legs are twisted together. Let dry a few minutes before next step, to ensure legs are good and stuck and glue is no longer hot.

4. Use black marker to draw spooky—or smiley—spider mouths on each spider, if desired.

5. Bend each spider leg into creepy crawly position.

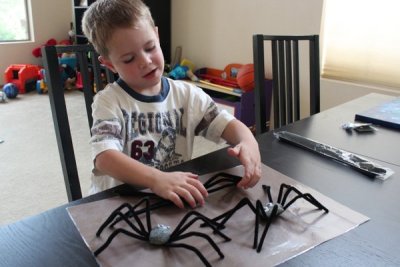
6. Sit back and appreciate your handiwork.

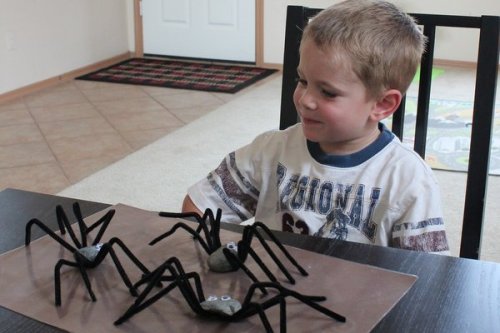
Mac, at 16 months, didn't care much about creating his own spider, which was fine with me as I'm pretty sure there'd be more wiggly eyes in his mouth than on the spider. He did, though, get quite a kick—and harmless scare or two—out of the completed spiders Bubby placed among his "collection of scary things" on the living room window sill.

Simple. Spooky. Success.

Today's fill-in-the-blank:

One of my favorite Halloween projects to do with kids is _________. (Links are welcome!)

Love, Gramma—snail-mail style

When Bubby was a little over two years old, I made him a nifty mail box for receiving snail mail from Gramma. I wrote a post on it, which you can see right here.

So you don't have to click on that link just yet, here's the photo of that original stickered-up sensation:

grandma mailbox_first.JPG

Bubby loved emergency vehicles of all sorts at the time, so that's how I adorned his box. The mini mailbox also included his name in stickered letters, but as I don't use his real name (nor Mac's) on the blog, I couldn't show how perfectly his name in red block letters fit across one side.

I've not been as consistent in my snail-mail sending as I intended, but each time I did, I'd ask Megan to place it in Bubby's box and raise the flag so he'd know mail from Gramma had arrived. More often than actual snail mail, though, I'd place a little something in the mailbox for Bubby to find each time I left his house after a visit, notification of such courtesy the little red flag.

Last time I visited Bubby, I noticed as we lay on his bed reading his bedtime story that his mailbox was up on a shelf he surely couldn't reach. "I broke it," he told me, when I asked why it was way up there.

Seems Bubby loved his grandma-mail box so much, he used it as a garage for his Matchbox cars. It was used so often and filled so to the brim that it ended up dented beyond repair and no longer has an attached back.

"I'll just have to make you new one," I told him, knowing I still had several empty boxes remaining at home (reference the original post for why that is).

"And I really need super heroes on this one, Gramma," he said.

Well, super heroes it would be, then.

As I had planned to make a grandma-mail box for Mac anyway—his first—I went ahead and made a new one for Bubby, too.

Per his request, Bubby got super heroes of various sizes and styles. Super heroes are his favorite thing in the world right now, especially Batman and Spiderman.

Mac's favorite things? Well, those would have to be Mickey Mouse and dinosaurs, so that's what adorns his little grandma-mail box (more dinos than Mickeys, but that's okay).

Just like Bubby's original grandma-mail box, the boys' names are featured in red block letters on one side of their box. Though just like with the original mail box, I can't show you that side as it would reveal the real names of my grandsons (and heaven only knows what might happen if I were to reveal that information online, right?).

I can show you this, though—the censored versions of my latest grandma-mail boxes for my boys, packed and ready to tote in my Grandma Bag to the desert this Friday:

Now Bubby will have two grandma-mail boxes. Which will surely please him, as they make not only super spots for snail-mail love notes from Gramma, they make pretty darn good garages, too.

Drive-thru garages, from what I gather.

Today's question:

When did you last mail a child a letter or other snail-mail sentiment?

Granny's buttons

I have two tins of buttons.

One is small and kind of boring. It's filled mostly with spare buttons in plastic packages, thrown into the can for safekeeping in the event a garment needs a replacement.

That small, boring can of buttons is mine.

Then I have a larger tin of buttons. It's filled to the brim with what looks like buttons, but they're actually treasures. Treasures from my mother-in-law, also known as Granny to most anyone who knows her.

Granny's tin of treasures became mine when she was moved into a nursing home a few years ago.

Inside Granny's tin that's now mine are hundreds of buttons. It's hard to imagine the years upon years of outfits losing buttons. Baubles and bits found in the washer or dryer on laundry day, buried deep in shag carpeting of long ago, or dangling frustratingly so by threads as one headed out the door to work, school, or special affairs.

Some of the buttons were surely from Granny's own dresses and blouses. Many more, though, likely wiggled their way off outfits worn by her six children, her first then second husbands, possibly even some from her nearly fifty grandchildren and great-grandchildren who stayed with her now and again.

Granny's tin also holds several cards filled with unused buttons, fancy bits never removed from their original packaging. Looking at them I wonder what plans Granny had for such treasures, plans she never realized for one reason or another.

I now have plans for Granny's buttons, for her treasures. I plan to share them with her many grandchildren. And her great-grandchildren, like Bubby and Mac, as well as her great-great-grandchildren, of which there are, surprisingly, already one or two.

I've not yet finalized the ultimate button-sharing plan, though, the projects I'll create to divide up Granny's buttons to be enjoyed by all. For now, I'm starting off small, passing them along to my children one by one, like this: 

When wrapping Andrea's birthday presents in July, I topped each with a button. One of Granny's buttons. One of Granny's treasures.

Brianna's birthday is this weekend. I'll be doing the same for her. Come Megan's birthday in December, she'll get treasure-topped gifts, too. Maybe my girls can start their own button tins with Granny's buttons.

I've pinned on my Pinterest boards several button project ideas and am still looking for more. Eventually I'll settle on one or two, then set to work sharing Granny's buttons. Her treasures.

In the meantime, I'll keep adding my own buttons and spare button packets to my own small, boring tin. Maybe eventually I'll need a bigger tin. Perhaps one day my tin will be like Granny's—filled to the brim with buttons.

They may look like buttons now, but they may one day be treasures. Treasures for my kids. For my grandkids and their kids, too.

Just like Granny's treasures. Just like Granny's buttons.

Today's question:

What do you do with your spare buttons?

Counting sticks

I didn't mean to lie to you, dear readers, but I did. In this post right here. Today, though, I plan to set the record straight.

You see, in that post about filling my grandma bag for my trip to the desert, I mentioned an activity that used straws and pony beads for a nifty little activity to encourage counting and fine motor skills. I intended to pack those items in my grandma bag but hadn't yet done so. And once I purchased the straws and attempted sliding a few pony beads on them just to see how easy it would be for Bubby, the cussing and straw-scrunching that ensued made it clear the <cussing> beads didn't fit on the <cussing> straws and Gramma would need to make some adjustments to the craft.

So I did. And here's the skinny on the crafty counting sticks Bubby enjoyed making and counting with—and that garnered high praise from Megan, an early childhood educator who thought the idea was quite creative and useful for even a classroom of kiddos.

What you'll need:

10 extra-long pipecleaners (I used 10 as I figured counting to 10 would be reasonable practice for Bubby, who's three and a half. You could go higher, if desired.)

pony beads

1 or 2 index cards cut into squares an inch or so in size and neatly numbered 1 through 10

clear tape

What you'll do:

Fold up about an 1/8-inch on the end of each pipe cleaner and twist around itself so there's no pokey parts to stab little fingers. On one end of each pipe cleaner, tape a numbered square; laying the pipe cleaner across the back of the number and securing with a single strip of tape works just fine.

Your work is done!

Now give your child the pipe cleaners and a bowl of pony beads with instructions to add as many beads as the number on each end.

Bubby thoroughly enjoyed adding beads—picking out "special" ones—then counting them over and over on their sticks, just to be sure it was right. I enjoyed watching his intense concentration as he threaded beads then carefully counted.

Once all pipe cleaners were filled, we pulled off the beads and started all over again. In fact, these photos were from Bubby's second day of playing with the sticks (just after waking, I might add, hence the jammies and adorable bedhead hairstyle).

There! Record set straight: Straws don't work; pipe cleaners do.

Today's question:

Did you—or your children—use an abacus to help master counting?

Lone cascarón

Once upon a time, I was a Girl Scout leader. During the eight years I was privileged to warp shape the minds of little Daisies and Brownies, my troops and I engaged in awesome — and some not-so-awesome — activities. One that I remember each year around Easter is the creating of the cascarones. It was one of the most successful crafts of my tenure.

Cascarones, as I enlightened my followers, are confetti-filled eggshells (cáscaras) broken over the heads of others to bring good luck. It's a popular tradition of the Hispanic culture, often seen at weddings and especially at Easter time.

Cascarones are pretty simple to make. Here are the steps and some photos:

1. To hollow out an egg, gently whack the smaller end of a raw egg with a knife to create a wedge for prying off the end.

2. Gently remove the end of the shell, creating a hole about the size of a 50-cent piece.

3. Gently remove the raw egg inside by letting it drop into a container.

4. Gently (yes, "gently" is the key to most of these steps!) rinse out the egg, using your finger (gently) to remove any egg white sticking to the shell. Set aside to dry.

5. Once the egg is completely dry, decorate the outside as desired. Gently, of course. A simple method with children is to use markers, as I did (hastily) with this example. Some traditionalists color the egg with commercial egg dyes typically used to color Easter eggs. Don't decorate with stickers as they prevent the shell from breaking during the fun.

6. Fill the decorated egg with confetti. Packaged glitter confetti from a craft store is best because it's most gleefully messy festive. Or use a hole punch or paper shredder (the "cross-cut" ones work great!) to make your own from colored paper.

7. Using a glue stick, carefully line the edge of the hole and glue a square of tissue paper over the hole. Allow glue to dry completely. Store egg in a safe place until the festivities.

The year of the Girl Scout cascarones, my family stepped out onto the front lawn Easter afternoon to crack wishes of good luck upon one another's noggins. We laughed and loved and left layers of confetti in the grass. Tidbits of good tidings were visible through the blades of green grass for months. Years after, a glint of gold or green confetti would often catch my eye as I sat on the porch swing, swaying and smiling as I remembered the multiple cascarones we cracked that festive Easter.

This year, I have one lone cascarón. Made for this post. With only a single egg to crack upon the head of a loved one, I'm considering which of those I'll be spending Easter Day with most needs a smack upside the head dose of good luck. Jim, Brianna, and Andrea best beware.

Unless, that is, a little Googling reveals the cascarones tradition has no rules discouraging the cracking of the goodies upon one's own head. Because these days, I'll take good luck any darn way I can get it!

Today's question:

What special memories do you have of decorating Easter eggs?